Trees and Construction Damage
Can you repair a tree damaged during a construction project? An excavator extensively damaged the roots of a large Live Oak tree in Austin, TX. This case study describes how A Good Morning Tree Service assessed and repaired the tree’s construction damage.
Case Study: Trenching Damage to a Protected Heritage Tree
An Austin property owner needed to replace an asbestos sewer line.
The plumbing company used an excavator to dig a trench to expose and replace the sewer line, causing extensive damage to a large Live Oak tree located nearby. A Good Morning Tree Service was called in to assess the damage, and save the tree, if possible.
Measuring the Protected Tree
We measured the damaged tree’s DBH (Diameter at Breast Height) at 27.9 inches.
The City of Austin has tree preservation requirements for all trees with a DBH of 19” and larger. Heritage Live Oak Trees (over 24” DBH) require a second level of permission to prune, remove or impact the tree’s CRZ (Critical Root Zone).
Removing or impacting a Protected or Heritage Tree requires a special permit from the City of Austin.
The city placed an administrative hold on the sewer line project until the Heritage Tree’s damage could be assessed and repaired.
Initial Site Inspection
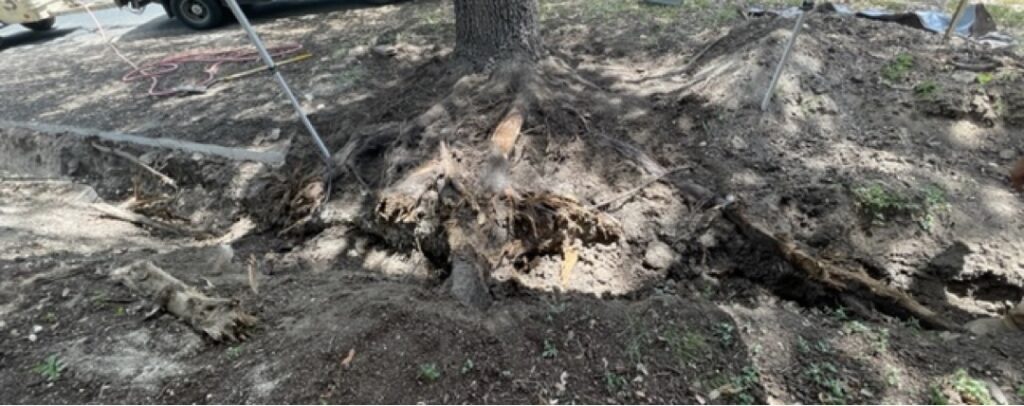
A mature (27.9” diameter / DBH) Live Oak was in the center of the front yard, close to the sewer line excavation trench.
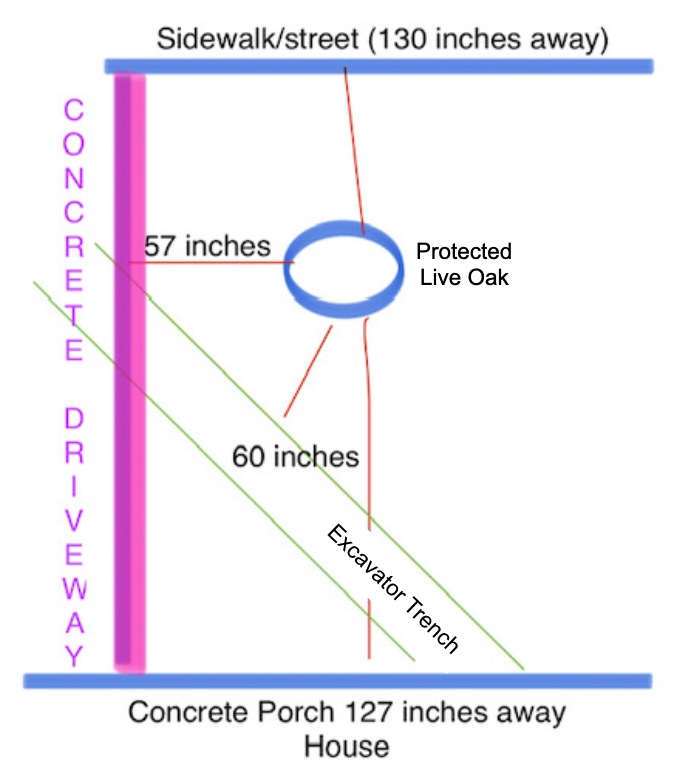
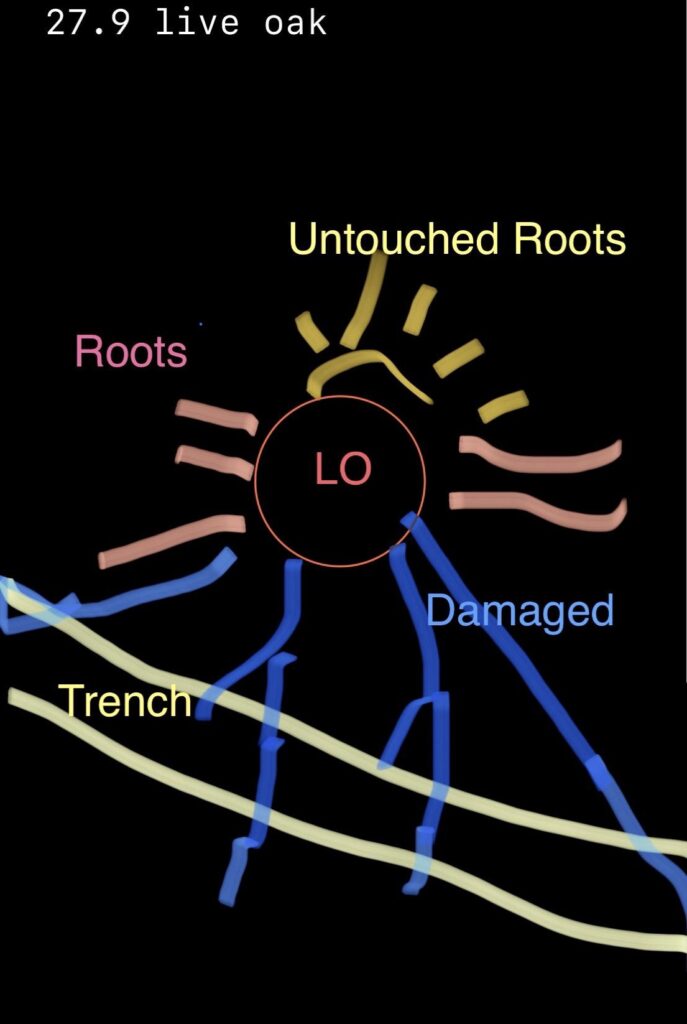
Two large roots were completely ripped and severed by the excavator, and three additional roots were damaged.
Assessing the Damage to the Protected Tree
To assess the extent of the damage, we used a tool called an air spade to expose the tree’s roots and collar. (Air spades use high velocity compressed air to loosen and remove soil around sensitive objects, such as tree roots, without cutting into them.)
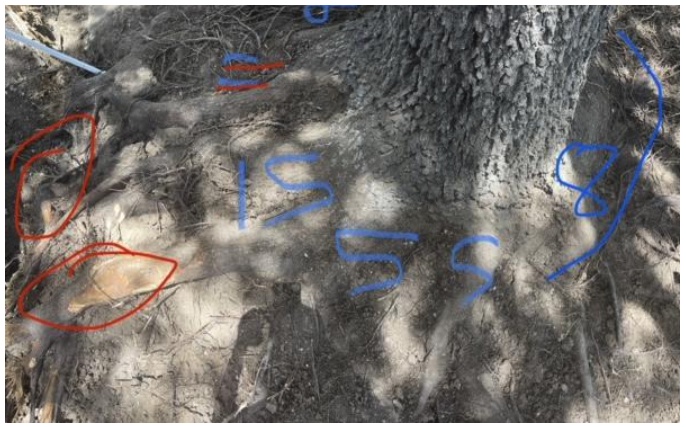
We used an air spade to gently remove the compacted soil from these areas of the root flare.
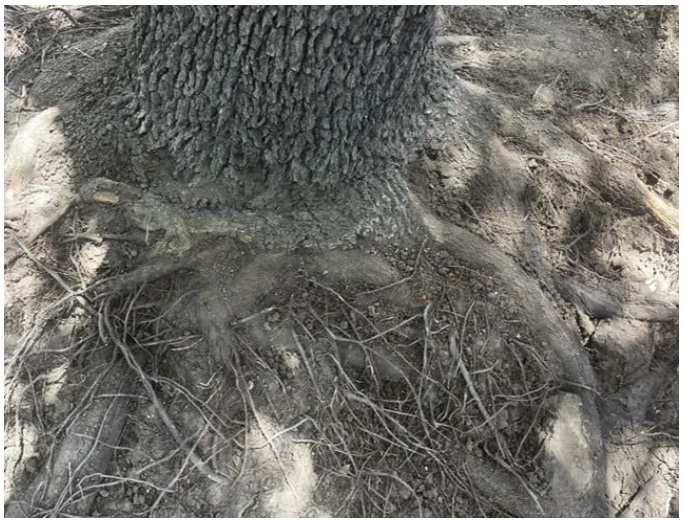
After air spading, the roots are visible, and we can calculate the percentage of the root system that has been damaged.
We found 18 pronounced roots, including 1 girdled root, and 8 main roots:
- 1 of the main roots was completely cut;
- 1 root was severed & half gone;
- 1 root was severely damaged with a crack.
Our calculations determined that just under 30% of the root system had been impacted.
In general:
- If less than 20% of a tree’s root zone is damaged, the tree should survive.
- If 40% or more of the root zone is damaged, the tree probably will not survive.
With around 30% damaged, this tree had a chance, but would need remediation – special care, moving forward.
Protected Tree: Damage Remediation Plan
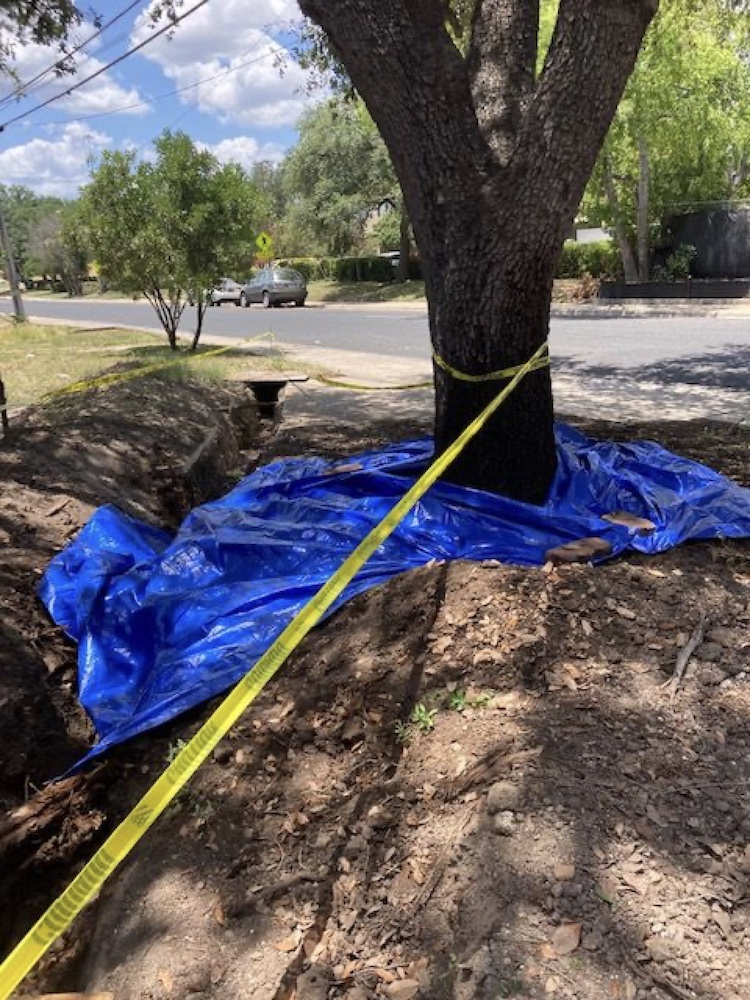
We put up caution tape to protect the area.
Then we watered the exposed tree roots, and covered them with a tarp to keep them moist and protect them for the next month.
We developed our remediation plan, and waited for the city plumbing inspector to visit the site and approve the completed repairs to the sewer line.
Year 1: Tree Damage Remediation
Damaged Root Cleanup
Clean up the immediate root damage so the tree can begin to heal:
- Cut the exposed roots flush to smooth their jagged edges.
- Apply rooting powder on the fresh cuts to help seal the wounds, and stimulate new roots to grow.
- Apply NutriRoot fertilization to the root zone to alleviate the tree’s shock, help the damaged roots recover, and promote new root growth.
CRZ (Critical Root Zone) Protection
Protect the Critical Root Zone (CRZ) during the remainder of the construction project:
- Add 10% compost to the soil inside the CRZ, to help keep the water in the soil from evaporating too rapidly.
- Erect a perimeter fence around the tree to protect as much of the CRZ as possible.
- Apply and maintain a 3-inch layer of mulch inside of the fence, leaving root flare exposed.
- Apply and maintain an 8-inch layer of mulch outside of the fence, wherever construction machinery and/or equipment will be parked. This will help prevent further soil compaction.
Watering Schedule
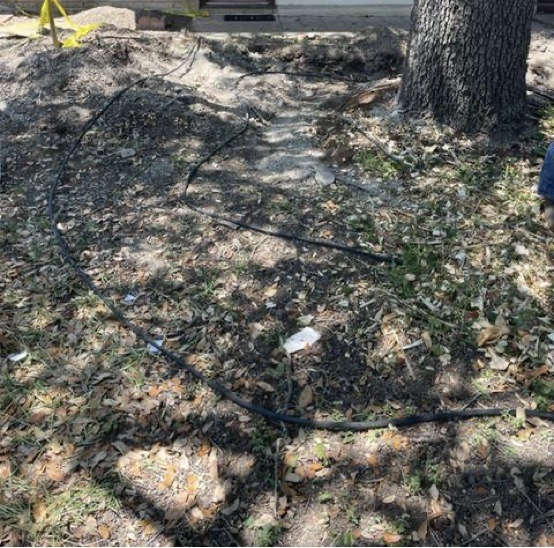
Use a splitter bib with a battery operated timer to control the watering.
Months 1-6
Water the tree minimally 3 days a week, using a soaker hose coiled around the tree for at least 20 minutes per session.
(If the temperature exceeds 100 degrees F, water every other day.)
Months 6-12
Gradually taper the watering schedule down to every 4 days.
Month 12
Reassess the watering cycle, and adjust if necessary.
Aeration & Fertilization
- Apply a liquid aeration product across the CRZ to 8” depth, to help the soil retain airspace.
- Upon project completion, apply a fertilizer treatment.
Year 2: Tree Damage Remediation
- Qualified arborist inspection to assess the tree’s progress.
- Austin Energy might need to prune branches away from the power lines.
- Prune the tree to balance its limbs and remove dead wood.
- Late Fall: check for growth. Apply systemic fertilizer treatment if necessary. (Note 1)
Year 3: Tree Damage Remediation
- Qualified arborist inspection to assess the tree’s progress.
- Apply Root Zone boosting fertilization to promote new root growth.
- Late Fall: check for growth. Apply systemic fertilizer treatment if necessary. (Note 1)
Year 4: Tree Damage Remediation
- Qualified arborist inspection to assess the tree’s progress.
- Late Fall: check for growth. Apply systemic fertilizer treatment if necessary. (Note 1)
Year 5: Tree Damage Remediation
- Qualified arborist inspection to assess the tree’s progress.
- Prune the tree to balance its limbs and remove dead wood.
- Late Fall: check for growth. Apply systemic fertilizer treatment if necessary. (Note 1)
Note 1: Systemic fertilizer treatments can last 2-3 years. This will likely not be required every year.

